The Blog
This article will provide information on the plastering techniques, these techniques being:
- Coving
- Drylining
- Skimming
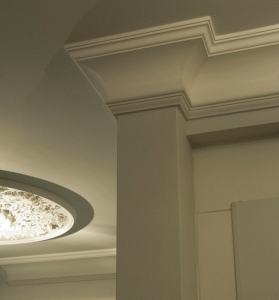
Coving is a technique that involves inserting a decorative mould along the top edges between the walls and ceilings of a room. It is fitted using cove adhesive spread along the full length of the cove top and bottom. The cove or cornice is made from a gypsum plaster core (calcium sulfate dihydrate, CaSO4·2H2O) encased in a white paper lining. Coving can also be used to conceal any surface cracks or settlement cracks where wall and ceiling joints meet. Cornice has the same function as the coving but is usually more decorative and detailed, hence it can require specialist fitting and moulding companies to carry out the work to install this.

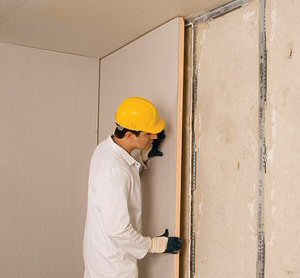
Dry lining is a quick and relatively clean technique to apply compared to two coat plaster systems. It involves the application of plasterboard to surfaces such as timber, masonry or metal using different fixings for each background.
When Dry lining a timber or metallic surface, this is known as ‘tacking’ which involves measuring the sheet of plasterboard, making any necessary cuts/ adjustments to the plasterboard and then fixing the plasterboard to the timber ceiling joists (wooden parts of a construction that supports the load of a roof, often set perpendicular to horizontal elements that make up the ceiling) or timber stud walls using clout nails or preferably drywall screws for better strength .

Skimming is the plastering technique of having to apply the final coat or top coat of plaster which is known as the skim. This is probably the most important step as it is this final coat that will be seen so skimming requires constant practice on your part or if you don’t want to perform skimming, it then requires the services of a skilled and experienced plasterer.
Below are a set of guidelines that must be followed in order to get good results with skimming plaster. Thees are:
1) Ensure that the the surface is ready to be skimmed. Plasterboard or backing coat can be skimmed over without preparing the surface. If an existing plaster or previously painted surfaces is going to be skimmed over, then a coat of diluted PVA bonding should be applied to prevent the plaster from cracking.
2) When plaster is being mixed, ensure that all buckets and tools are very clean as any tiny pieces of old plaster can ruin the skimming process.
3) Always mix plaster by adding the water first, then slowly add the plaster and mix it well either with a wooden stick or mixer drill.
4) If you are plastering a room, do not try to do two walls that are touching each other (e.g. like in a corner) at once or this will make it extremely difficult as you will damage one wall whilst plastering the other.
Note: There are two ways of applying the final coat of plaster, one method uses one coat of finishing plaster and the second method uses two coats of finishing plaster. For DIY use, it will probably be easier to use two coats instead of one, to do this simply apply the plaster then apply another coat of plaster before the first coat has gone off. Wait for this coat to go off sufficiently before polishing it.
About the author
Our services
Popular Posts
- Steel Beams Used In The Construction Of Property
March 26, 2012 - Plumbing and PEX Piping
April 4, 2012 - Tips For Planning To Build A New Kitchen
March 26, 2012
- Steel Beams Used In The Construction Of Property
Contact us
Suite M6
5 Blackhorse lane
London
E17 6DSEmail: info@tgbuilders.co.uk
Tel: 020 8531 6361Quick contact
